How to make a Raspberry Pi NAS server
Apr 9, 2022 · 3 min read
Note
Originally posted on my old blog in April 2022. Kept as written. The prices, the links and the advice are all from 2022.
Imagine this senario, you need a lot of pictures and/or important files stored someplace locally, and you want to access it through every computer/phone, but all of your storage is full, how do you store those pictures/files?
Well, the Raspberry pi can be a great soulution. The Raspberry Pi uses a lot less power than a regular NAS server, and it's pretty cheap and easy to setup. So here's how to make it...
Step 1: Getting the components
First, you need these components, some are needed and some are optional:
- Raspberry Pi 4B / 2G RAM: $35 Dollars ¥223 Yuan (You can buy the 4G and 8G version, but it's more pricey)
- Case for Raspberry Pi (Optional): If you are a geek, you can 3D print one like I did, anyways, here it is. (Credit to Michael Klements for designing the case (Aaaand making his own tutorial of the making of the case), he is a great tech youtuber and you should definitely check him out!)
- Micro SD Card (Sandisk 32 GB here): 14 Dollars/89 RMB. This is for system installation, or if you only have a few files, using a 32 gigabyte sd card would be fine.
- SSD or HDD (Optional) (Can be Leftover SSD or HDDs)
- I2C display (Optional if you want the case)
- 3.3V Fan (Optional if you want the case)
Step 2: Installing the Raspberry Pi OS
- Download the Raspberry Pi OS from here. If you want a GUI Graphical Desktop to do gui applications, you can download the full version, but if you want it to be a lighter system and run more smoothly as a NAS server, use the lite version of the OS.
- Open Win32DiskImager and choose the image and transfer it to the Micro SD card OR use Etcher on mac and Rufus on windows, same steps.
- Plug the Micro SD card into the raspberry pi and start it.
Step 3: Commands for the SMB server
Open a terminal and enter this command, this command installs the samba module which is used to create the SMB server:
sudo apt-get install sambaAfter the necessary installation, use nano or vim to edit this file:
sudo nano /etc/samba/smb.conf
# or
sudo vim /etc/samba/smb.conf
Write these lines of code at the end of the file. Inside the top big braclet
[], you should write your NAS Share name there without spaces, e.g.admins-nas-share,Nas-share. The path should be the folder you want to share (Must be created) e.g./home/pi/NAS-SHARE.[Your NAS Share Name (No Spaces)] path = /Your/path/to/the/folder writeable=Yes create mask=0777 directory mask=0777 public=noCreate an account on samba with your Raspberry Pi username. After the terminal prompts you for an password, enter your desired password for samba.
smbpasswd -a (your raspberry pi user account)Restart the samba service:
sudo systemctl restart smbConnect to your file-sharing service. On macOS, go to the "Finder Menu bar":

Click "Go" and click "Connect to server":
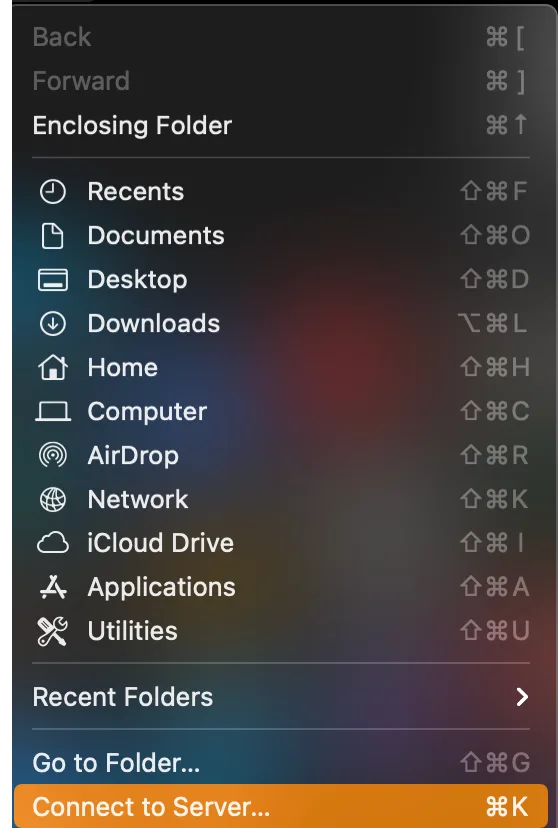
After that, enter your NAS server's ip address and your NAS share name and click "Connect":
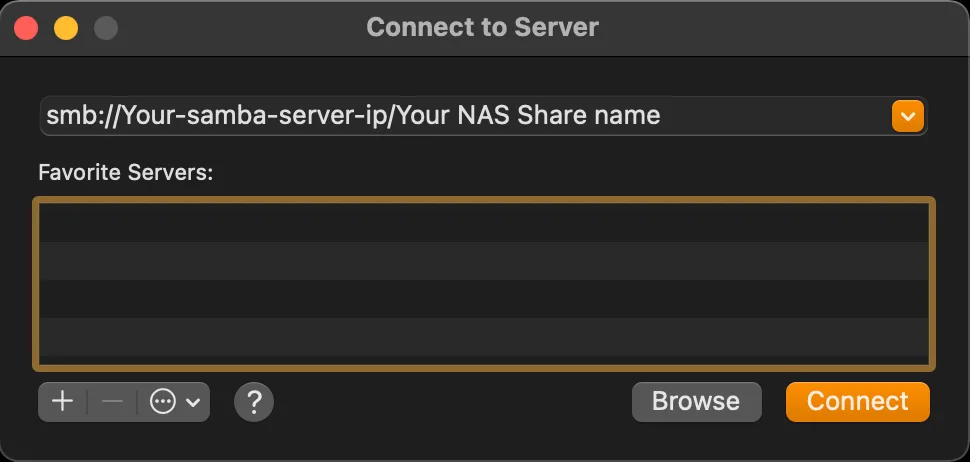
Click on your server and enter the samba credentials.
Now you are done! Access all of your saved files, images, videos on the server!
Here's a showcase of the server:
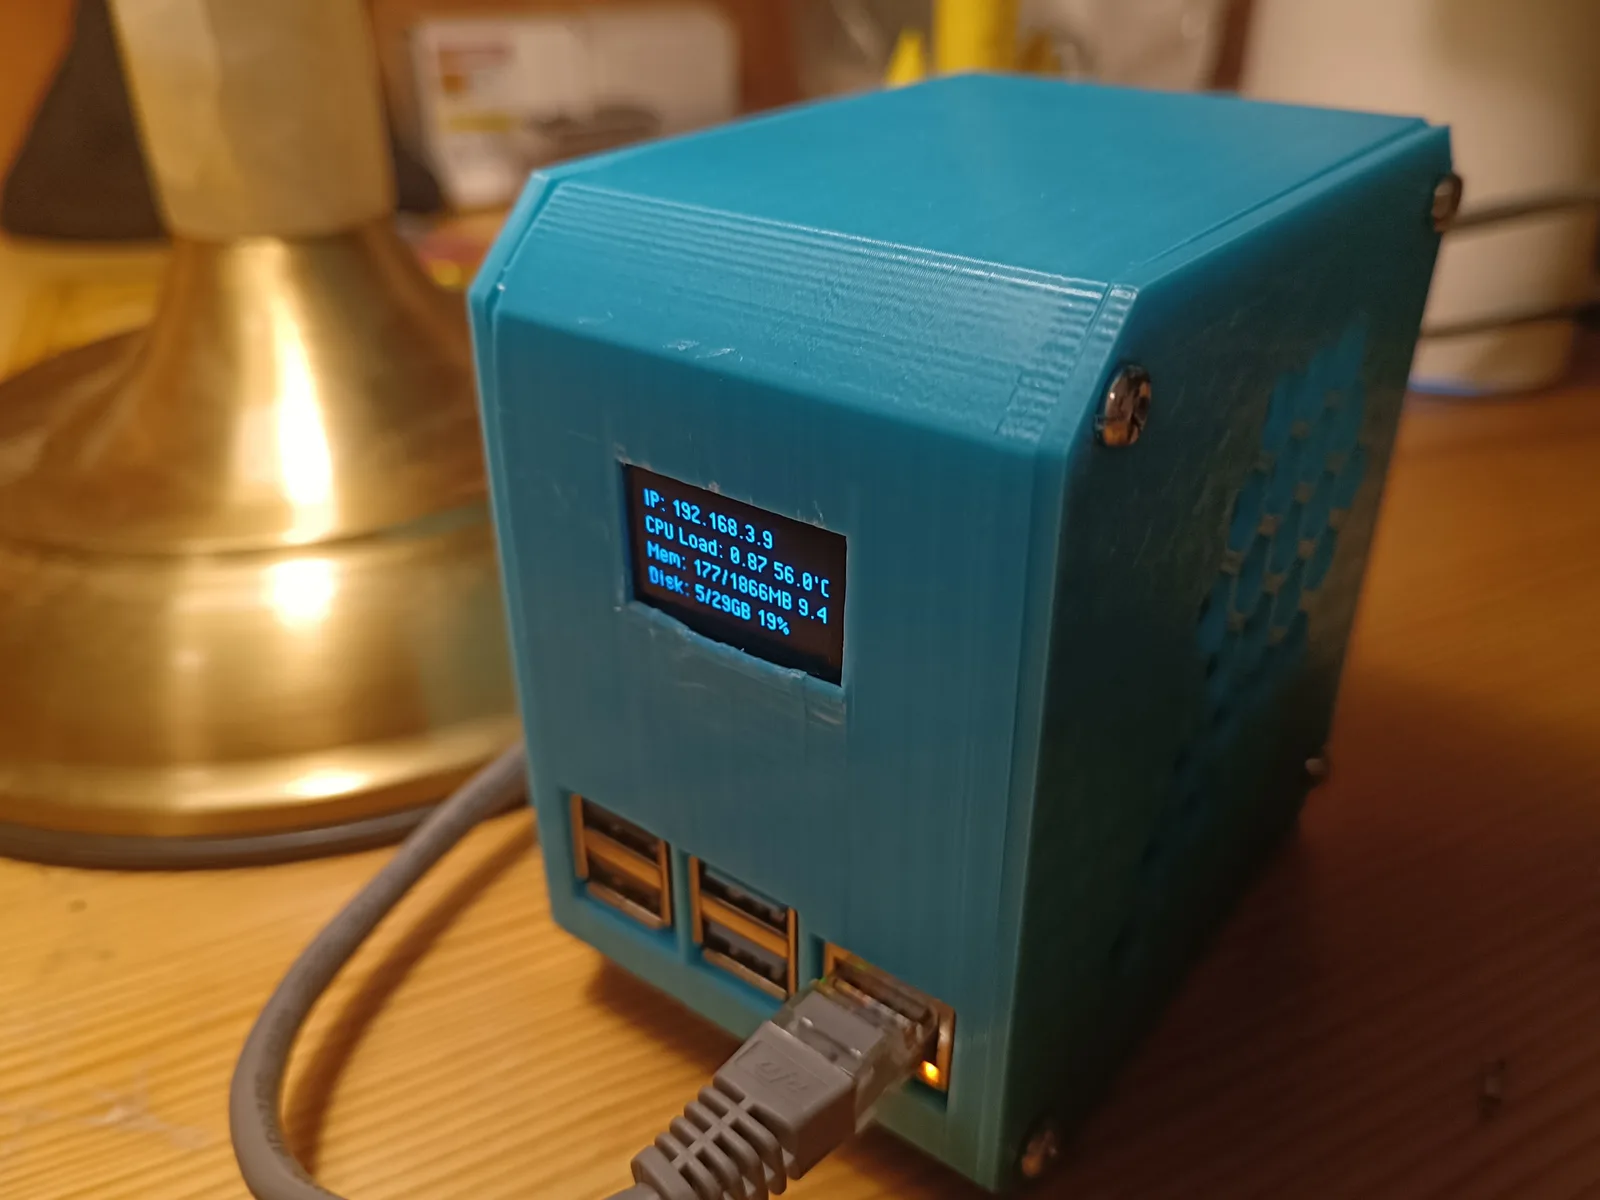
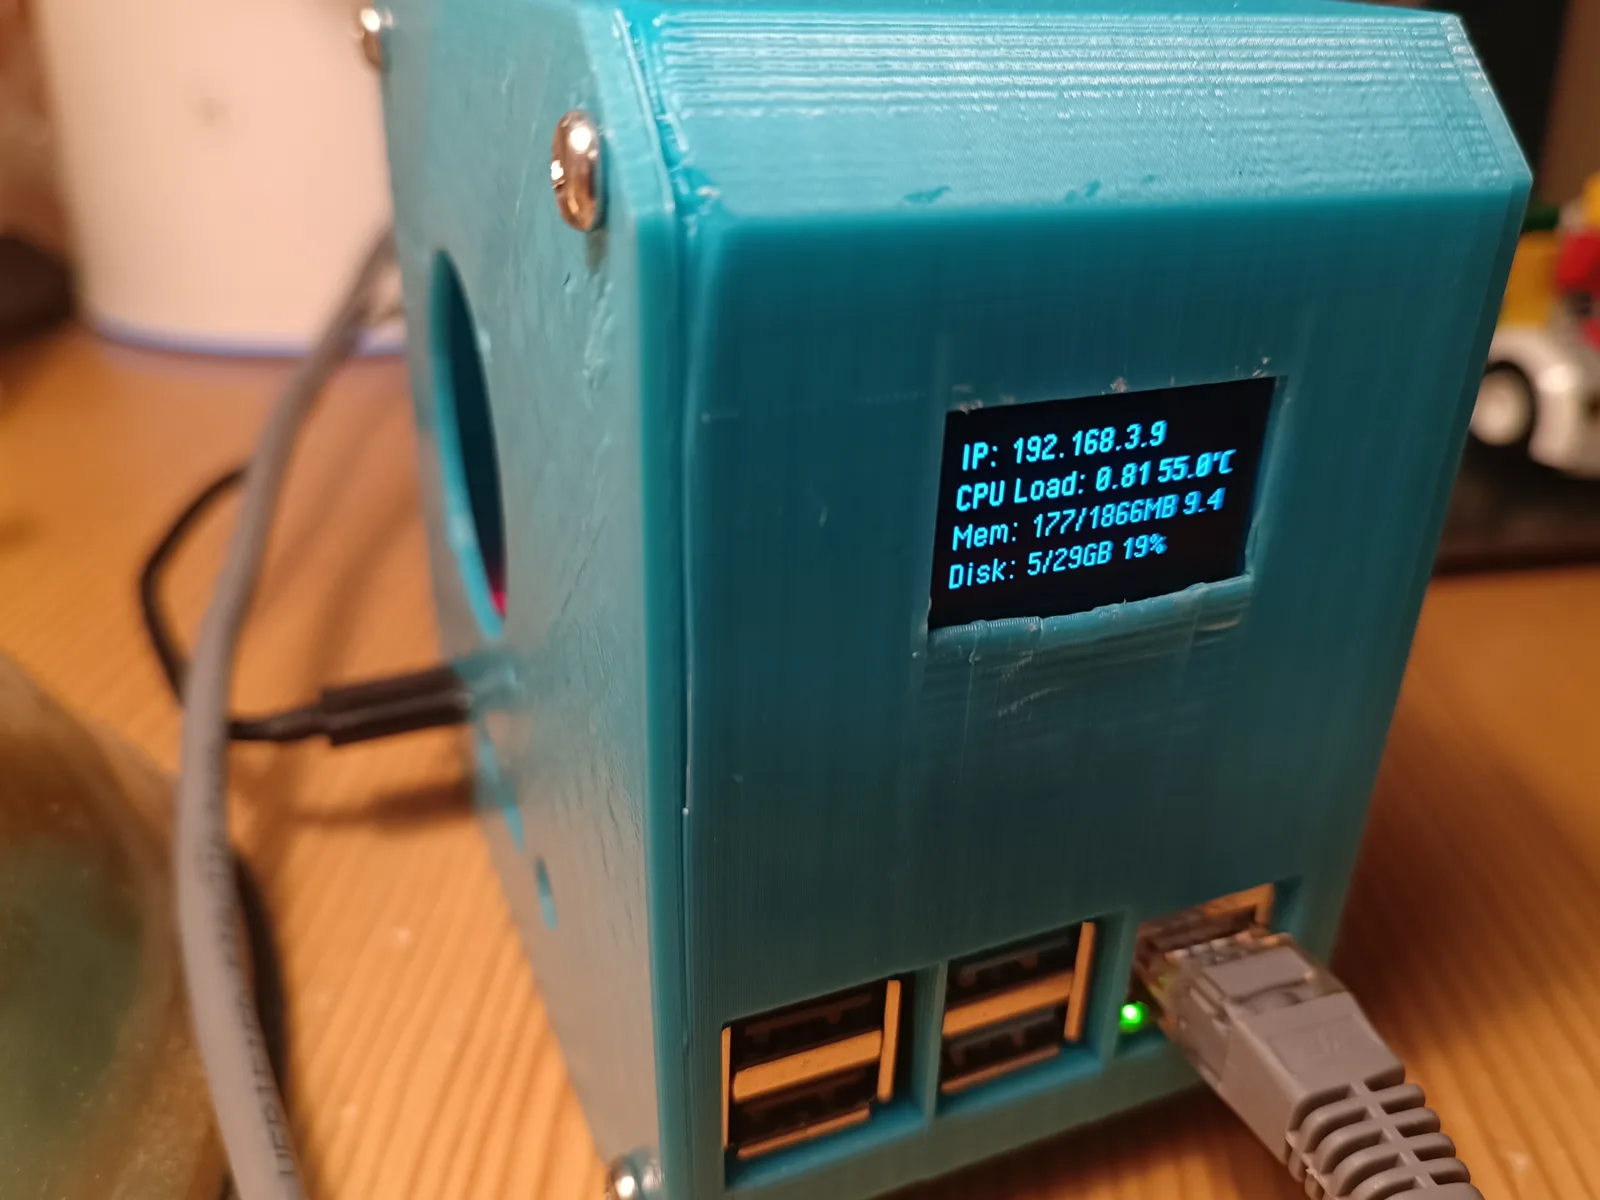
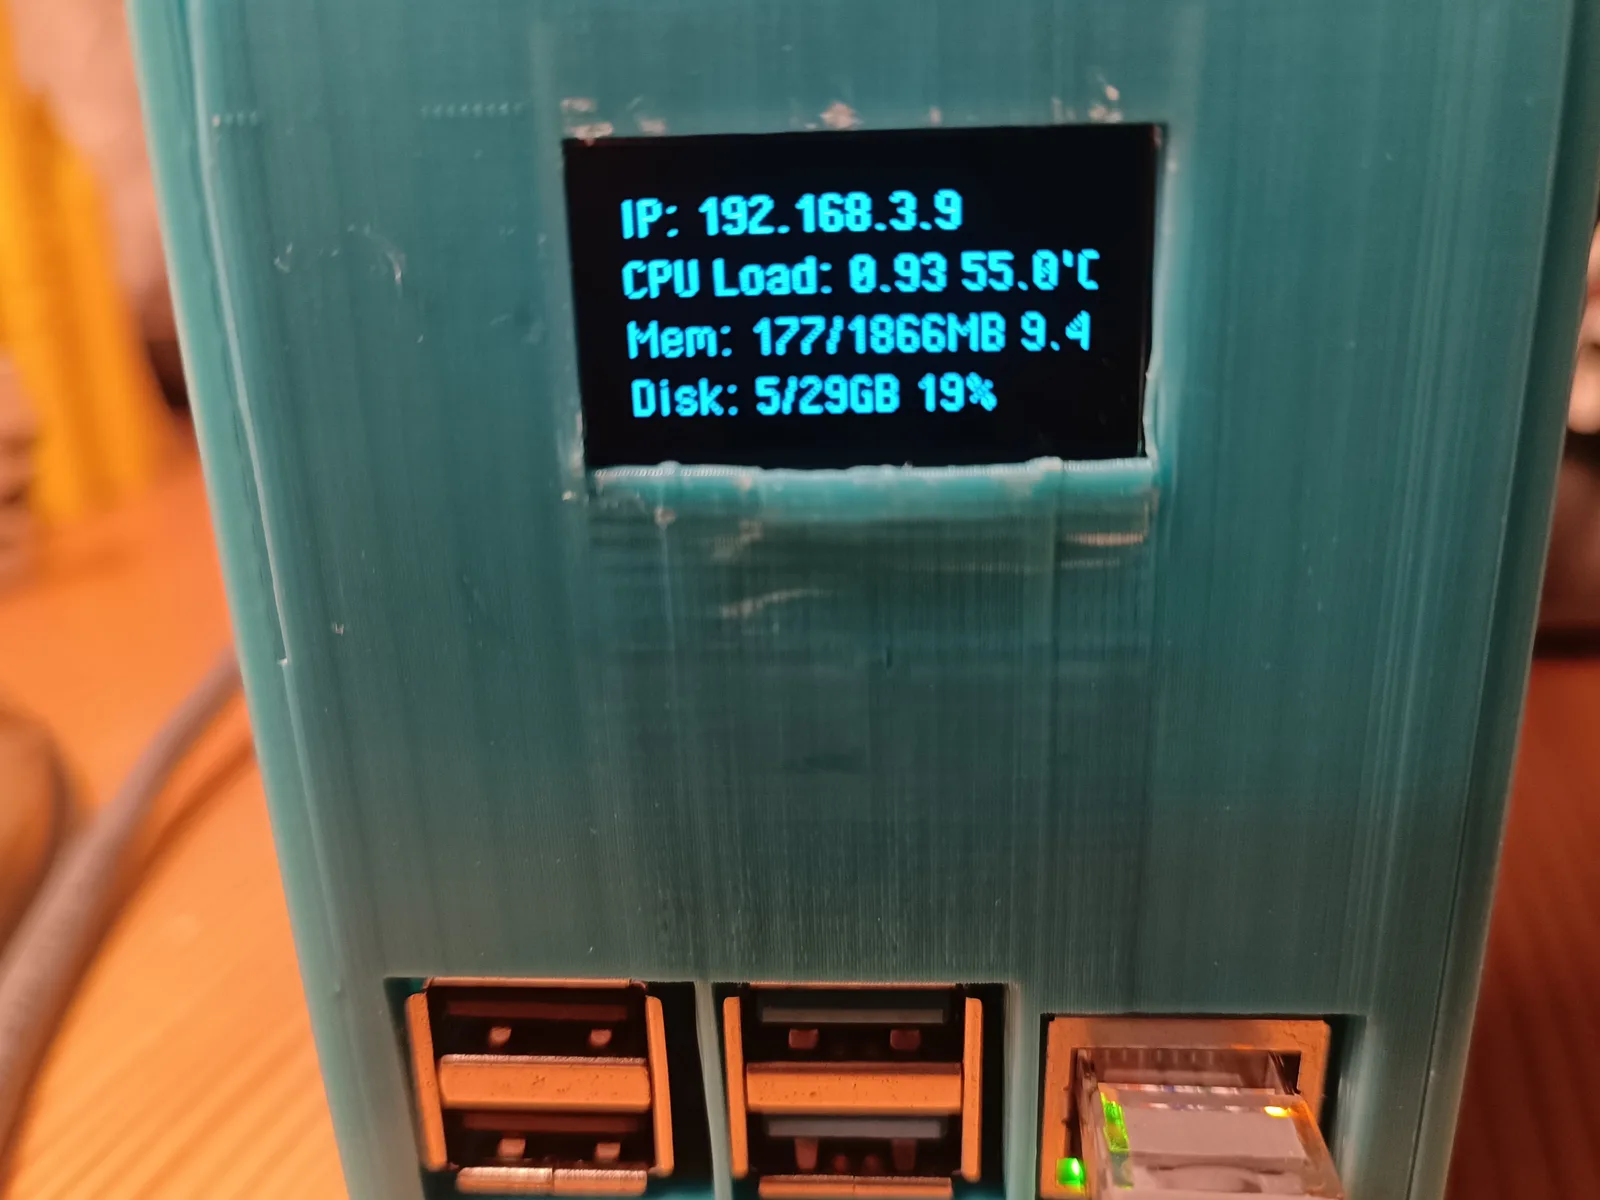
Now doesn't that look good? :3
Bye!